Make Your Own Runes: A Step-by-Step Guide
Are you a Wicca enthusiast, spiritual seeker, or DIY crafter looking to deepen your practice with a hands-on project? Crafting your own set of runes can be a deeply personal and spiritually enriching experience. In this guide, we’ll walk you through the process of creating your own rune set, from selecting materials to infusing them with intention and meaning.
The Art of Rune Casting
Rune casting is an ancient form of divination that hails from Norse traditions. Unlike fortune-telling, rune casting serves as a guidance tool that taps into your subconscious, helping you explore potential outcomes and solve problems. The Elder Futhark runes, an ancient alphabet discovered by Odin according to Norse legend, symbolize universal forces and the gods themselves.
Why Make Your Own Runes?
Creating your own runes allows you to infuse them with your unique energy and intentions, making them more powerful and meaningful. Whether you choose wooden discs, river stones, or gemstones, the process of crafting these sacred symbols will deepen your connection to this ancient art.
Materials You Need
- 24 wooden discs, beach/river stones, or gemstones (plus a few extras)
- Clear workspace
- Pyrography tool or Dremel tool
- Enamel or acrylic paint
- Permanent marker
- Olive oil and essential oils (optional)
- Clear stone sealer or epoxy resin
Step-by-Step Guide to Crafting Your Runes
Step 1: Preparing Your Workspace and Materials
Before you begin, clear your workspace and gather all your materials. Ground and center yourself through meditation, focusing on your intentions for the rune set. What do you hope to achieve or learn from using these runes?
Step 2: Selecting Your Base Material
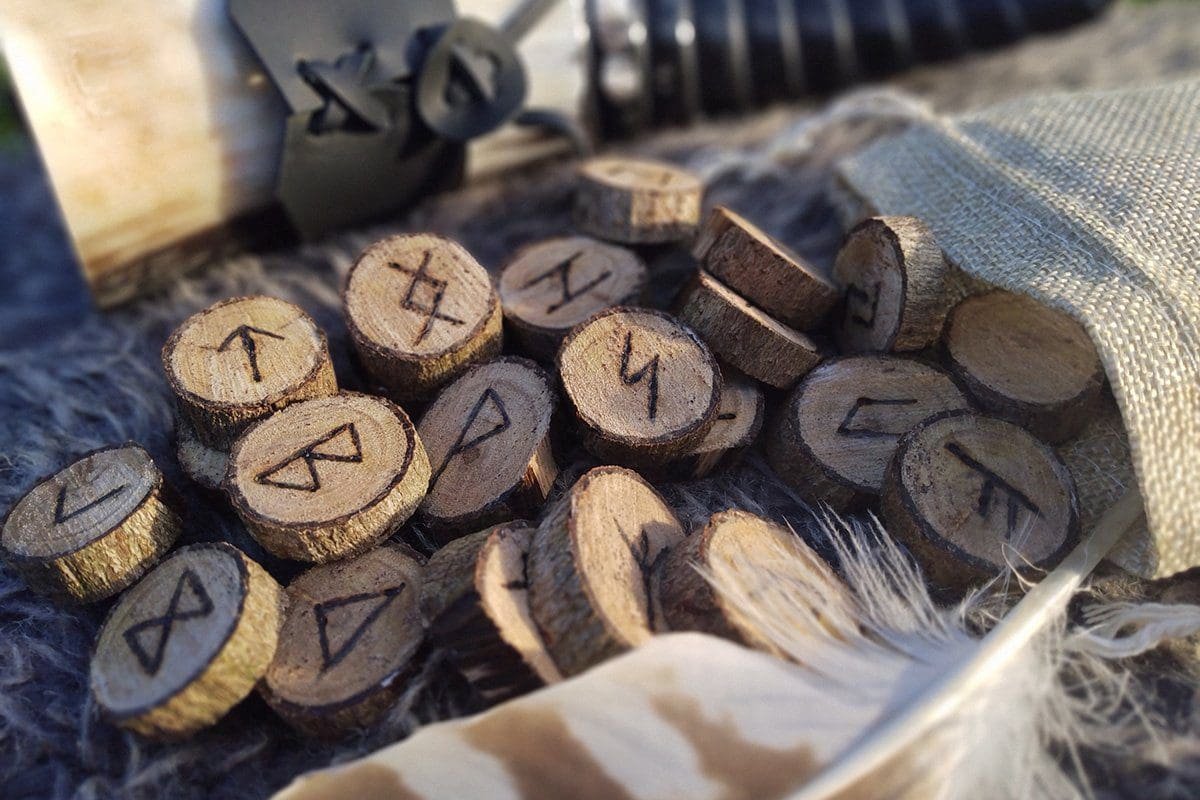
Wooden Discs
- Sketch: Use a pencil to outline the Elder Futhark symbols on each wooden disc.
- Carving: Burn the symbols into the wood using a pyrography tool or carve them with a Dremel tool.
- Painting: Paint over the carved symbols with your chosen color. Once dry, seal the runes with olive oil and essential oils that align with your intentions.
River Stones or Beach Stones
- Cleaning: Wash the stones thoroughly to remove any dirt or debris.
- Painting: Use enamel or acrylic paint to draw the symbols. Allow the paint to dry completely.
- Sealing: Apply a clear stone sealer to protect the paint and enhance durability.
Gemstones
- Marking: Use a permanent marker to outline the symbols on the gemstones.
- Carving: Carve the symbols with a diamond cutting wheel on a Dremel tool.
- Filling: Fill the carved symbols with enamel paint or epoxy resin to make them pop.
Step 3: Infusing Your Runes with Intention
Hold each rune up to your heart chakra and chant its name to infuse it with your energy and intention. Visualize the rune’s meaning and how it can guide you in your practice.
Step 4: Cleansing Your Runes
Finally, cleanse your runes using a form of smudging, such as sage or palo santo. This step ensures that your runes are spiritually clean and ready for use.
Creating your own runes is a fulfilling and meaningful project that enhances your spiritual practice.
By following these steps, you can craft a set of runes that are uniquely yours, imbued with your energy and intentions.
Ready to take your rune casting to the next level? Share your creations with us and join our community of Wicca enthusiasts and spiritual seekers. Happy crafting!